It is nearly impossible to install a cylinder properly when the engine is on the airplane. Here’s why.
I suppose it comes as no surprise to readers of this column that I’m not exactly a fan of top overhauls. I never like to see any cylinder removed from any piston aircraft engine unless there’s absolutely no alternative. I truly hate to see multiple cylinders removed simultaneously. Removing all cylinders at once—the so-called “top overhaul”—is something I try to avoid at all costs, except it truly extraordinary circumstances.
One of those truly extraordinary circumstances has had my phone ringing off the hook in recent weeks. The calls have been from frantic owners of Continental 520- and 550-series engines whose Superior Millennium-brand investment-cast cylinders are being euthanized by Airworthiness Directive 2014-05-29 and its predecessor 2009-16-03 that is legislating thousands of these magnificent cylinders out of existence the moment they reach the calendar age of 12 years. Sadly, I’m forced to tell these aircraft owners that it’s too late to fight this AD and that there’s really nothing they can do but comply.
I can only imagine what my phone will doing this summer if the FAA issues its long anticipated AD against ECi Titan-brand cylinders, which would euthanize about ten times as many perfectly good cylinders as the Superior Millennium AD. What a travesty!
Risky business
Cylinder replacement is a highly invasive and risky procedure with a long history of causing catastrophic in-flight engine failures that cause airplanes to fall out of the sky and sometimes hurt or kill people. I have been personally involved with at least a half-dozen of these maintenance-induced catastrophic engine failures—either as expert witness or investigator—where the engine either “threw a rod” through the crankcase or suffered the complete separation of a cylinder from the engine, resulting in a total loss of power. In some cases, the pilot made a successful forced landing; in others, the outcome was serious injury or death.
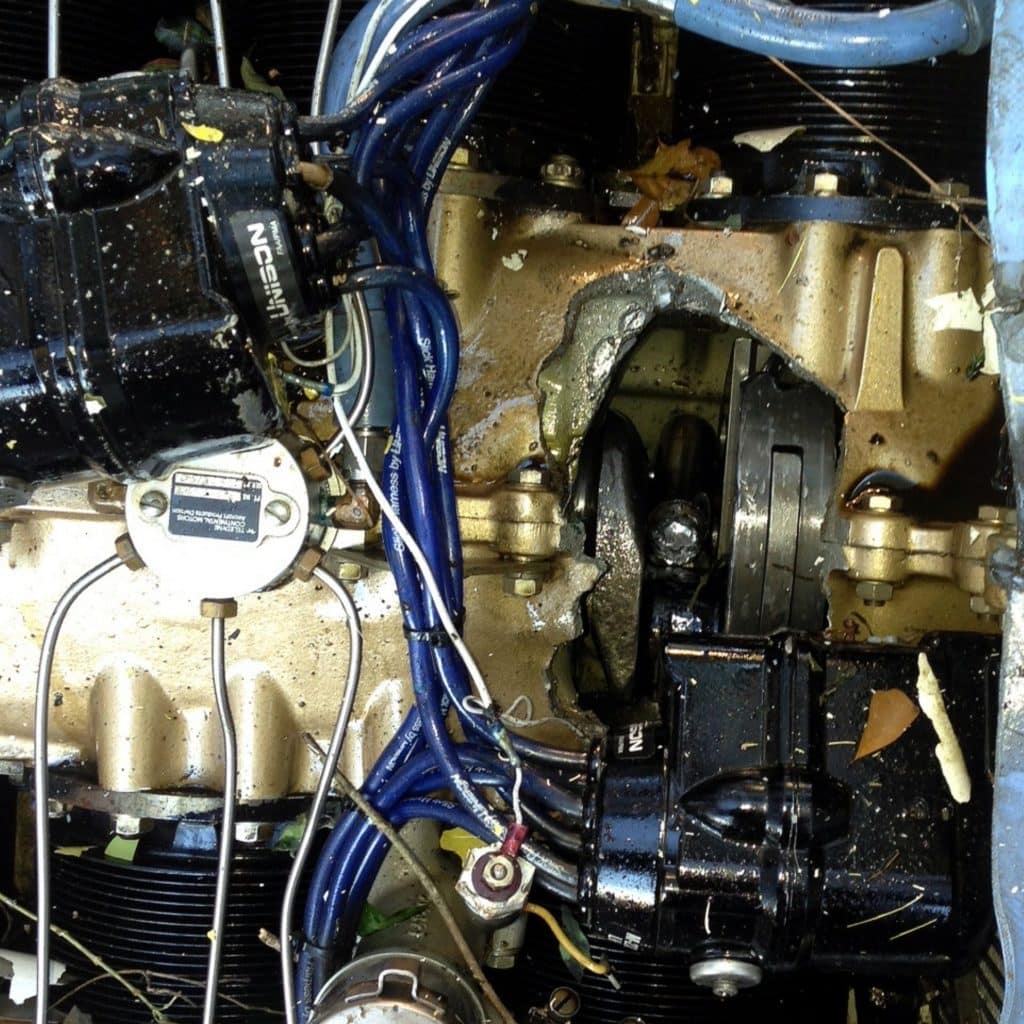
Cylinder replacement—and especially replacement of multiple cylinders at once—is a procedure that needs to be executed perfectly. If it isn’t, there can be dire consequences. Yet it’s a procedure that most career general aviation A&Ps perform routinely without any apparent fear or concern, seemingly oblivious to the fact that even a tiny mistake could result in an engine failure that could destroy an aircraft and hurt or kill someone.
Why aren’t these mechanics nervous? Undoubtedly because they are convinced that they always perform the cylinder transplant procedure properly, and that only careless or incompetent mechanics screw it up. Of course, this is a dangerous attitude. Even the most experienced, careful and cautious mechanics screw up occasionally. (Do not ask me how I know this.)
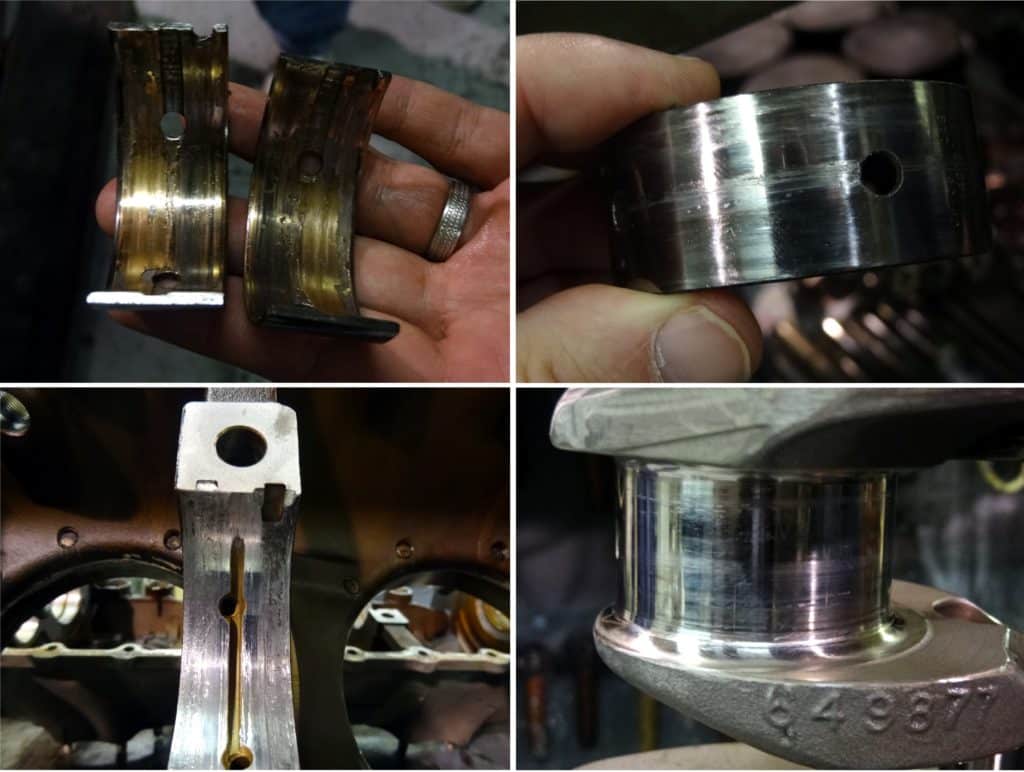
But wait. It gets worse!
Is “properly” impossible?
I discussed this issue recently with Roger D. Fuchs—veteran A&P/IA, aircraft engine overhauler, accident investigator, expert witness, FAA-Designated Engineering Representative (DER), and really smart guy—who specializes in research on fastener torque and engine assembly practices. Roger chastised me for blaming these maintenance-induced engine failures primarily on mechanic screw-ups.
“It cannot be established that any maintenance action should be withheld because of the vague possibility that it might be performed improperly,” Fuchs wrote. “My concern comes rather out of decades of experience with Continental engines, particularly the design of crankcases, main bearings, fasteners and assembly practices. All my experience indicates that there is a major risk to safety and airworthiness when performing [top overhauls] on mid- to high-time Continental engines, not as a result of improperly performed maintenance actions but rather as the result of maintenance actions with experienced mechanics are attempting to perform properly according to the manufacturer’s recommendations as published.”
In short, Fuchs contends that there’s a significant risk that an engine might come apart after cylinder work (especially a top overhaul) even when the work is performed exactly as directed by the manufacturer. How can that be? According to Fuchs, the root cause of spun bearings, thrown rods and separated cylinders is simply “failure to achieve sufficient preload in the assembled fasteners.”
It’s all about preload
“Preload” is the technical term for the clamping force created by tightening a fastener (typically a threaded bolt or stud) that holds assembled parts together. Having sufficient preload is the key to a strong and reliable bolted joint that will not loosen, break or shift under load. In order for a bolted joint to be stable under cyclic repetitive stress, the preload on the fasteners must be greater than the maximum stress that is trying to pull the joint apart. If this condition is met, the joint will not separate and the fasteners won’t “feel” the repetitive stress cycles. But if it isn’t, the joint will shift under load and the fasteners will ultimately fail from repetitive stress fatigue.
Consider a cylinder on a Continental 520- or 550-series engine. During the peak pressure point in each combustion cycle, the pressure in the combustion chamber will reach 800 to 1,000 PSI. The piston diameter is 5.25 inches, so its surface area is 21.6 square inches and the peak force trying to pull the cylinder off the engine is on the order of 20,000 pounds. Each cylinder is bolted to the engine with eight fasteners—six 5/16”-diameter “deck studs” threaded into the crankcase and two 1/2”-diameter “through bolts” that pass all the way through the crankcase and do triple duty of clamping the main bearing supports in the crankcase halves together plus holding down a pair of opposing cylinders. In a perfect world, the 20,000 pounds of force trying to rip the cylinder off the engine 20 times every second would be equally divided among the eight fasteners, so each one would bear 2,500 pounds of force. (In the real world, of course, things are never that simple.) To be on the safe side, we’d want each of those eight fasteners to be tightened to a preload of 3,000 or 4,000 pounds.

How do we obtain the desired preload? In a perfect world we’d tighten the cylinder base nuts so that the deck studs stretched by about .005” and the through bolts stretched by about .035”. In the real world, unfortunately, mechanics have no practical way of measuring the stretch of the deck studs and through bolts, so they are forced to rely on using a calibrated torque wrench to tighten the nuts to manufacturer-specified torque values in an attempt to establish fastener preloads that are in the desired ballpark. This turns out not to be a very reliable method.
The trouble with torque
The problem with the torque-wrench method is that the amount of fastener preload generated by torqueing a nut to a specified torque value can vary quite a bit. That’s because the lion’s share of the applied torque is dissipated overcoming friction—both friction under the nut face and friction of the threads—leaving only a small and rather unpredictable portion of the applied torque to generate preload on the fastener.
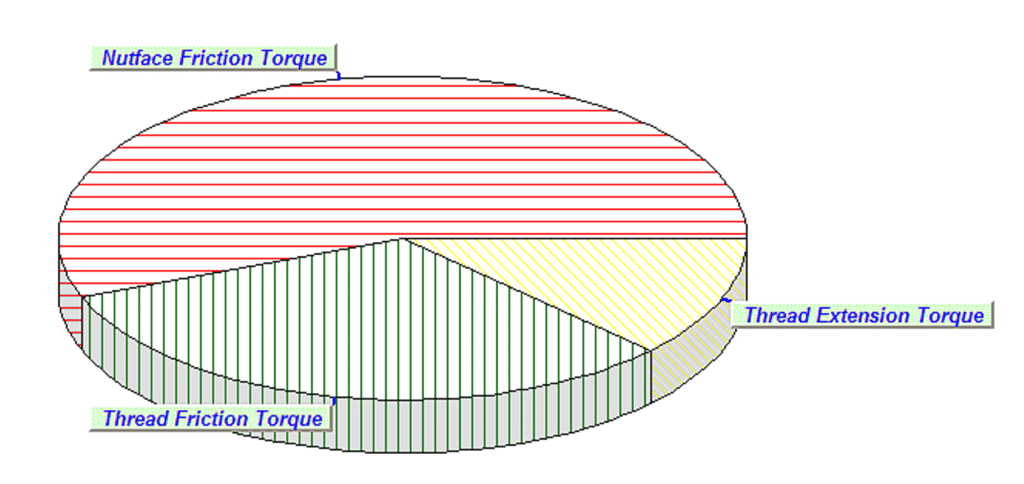
Figure 4: When using a torque wrench to tighten a dry steel fastener, at least 50% of the tightening torque is dissipated overcoming friction under the nut face, and another 35% overcoming friction of the threads, leaving only 10% to 15% generating preload on the fastener. Lubrication of the nut face and threads can have a dramatic effect on this.
If the fastener is torqued dry, then 85% to 90% of the applied torque is dissipated overcoming friction, leaving only 10% to 15% to generate preload. That’s why both Continental and Lycoming specify that cylinder deck studs and through bolts should be torqued “wet” (by applying lubricant to the fasteners) to reduce these frictional losses and increase the preload achieved by torqueing to a specified value.
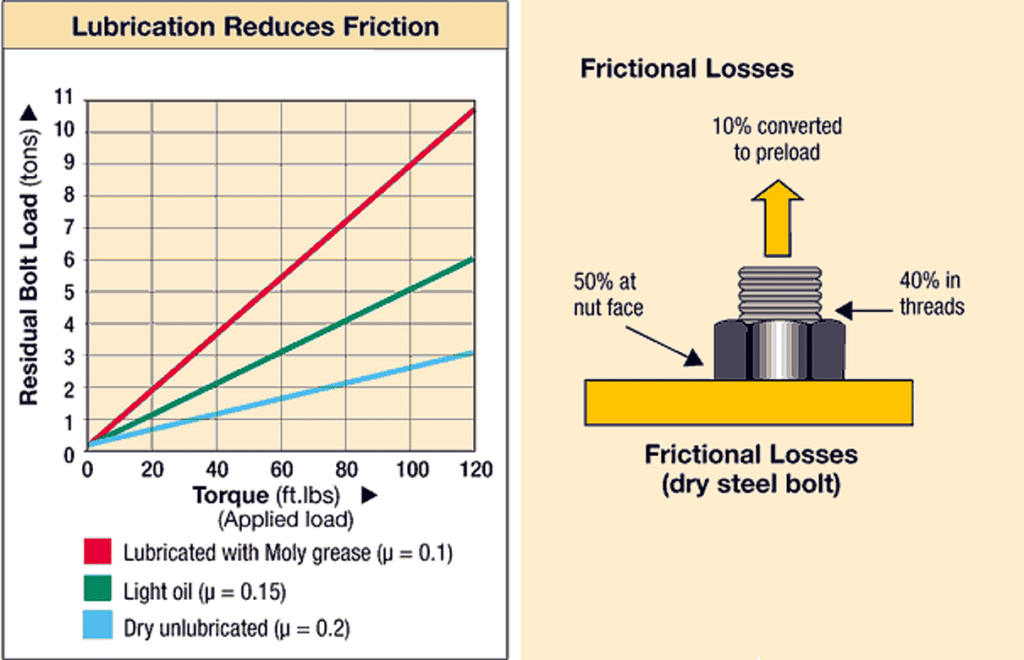
The “wet” torque method works adequately during initial engine assembly at the factory or engine overhaul shop when the engine is mounted on an assembly stand and all the fasteners are new. But it works far less well when cylinders are being replaced in the field with the engine still mounted in the airplane.
Obstacles to proper preload
Roger Fuchs identified five obstacles to achieving proper fastener preload when performing cylinder installation on an engine mounted in the airplane:
1. The fasteners aren’t new. When an engine is initially assembled at the factory (or by a first-rate overhaul shop), the through bolts, deck studs and cylinder hold-down nuts are all new components with cadmium-plated threads in perfect condition. The cad-plating is very slippery (helping to reduce friction) but very thin (typically 8 microns thick, one tenth the thickness of a human hair) and relatively soft, making it easy to damage,
Many field-overhauled engines are assembled with repaired crankcases in which the deck studs are not replaced and may have been torqued numerous times with most or all cad-plating removed by wear or cleaning. Through bolts and hold-down nuts may also be reused (although they shouldn’t be).

Things get even worse when cylinders are replaced with the engine on the airplane. Through bolts and deck studs are never replaced, and hold-down nuts may be reused at the mechanic’s discretion. The threads of through bolts, deck studs and hold-down nuts may be damaged but it’s almost impossible for a mechanic in the field to evaluate this.
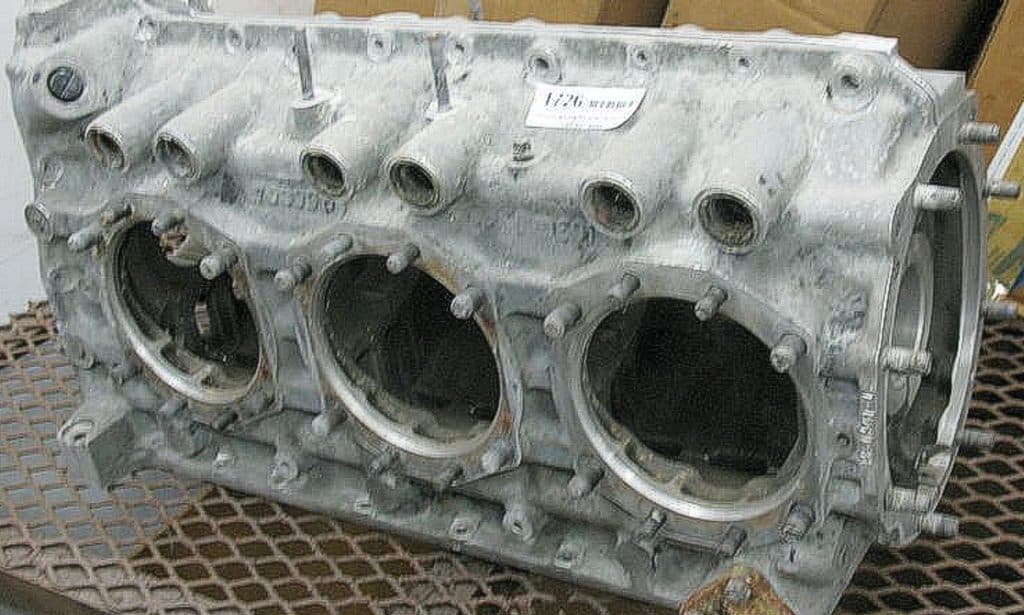
2. Fasteners may not be adequately lubricated. Both Continental and Lycoming specify that cylinder fasteners are to be torqued “wet.” Continental calls for using 50-weight engine oil, while Lycoming suggests using a 90/10 mixture of engine oil and STP.
To achieve proper preload, the lubricant needs to be slathered onto both the fastener threads and the nut face area. But according to Fuchs, “mechanics are generally reluctant to use much oil on threads and nut faces during cylinder assembly” because it “conflicts with their innate desire for tidy-looking engines.” Fuchs goes on to say “I find use of too little lubricant rather common in the maintenance industry; it’s a very serious issue when assembling used fasteners.”
3. The lubricant itself is rather poor. Fuchs also points out that plain 50-weight engine oil (e.g., Aeroshell W100) is a lousy thread lubricant because it lacks synthetics like PAO and anti-wear additives that would make it much slipperier. Add this to the likely loss of slippery cad-plating from the worn fastener threads, not to mention the possibility of thread damage, and it’s anybody’s guess whether proper torque will result in proper preload.
4. Wrench access is limited. Both Continental and Lycoming call for a two-phase tightening procedure where all the cylinder hold-down nuts are first torqued to 50% of their final torque in a specified tightening sequence, and then they are torqued to 100% of their final torque following the same sequence. An important reason for doing it this way is that consistent results can only be obtained if the final tightening sequence is performed using a single continuous motion of the torque wrench. If the movement of the wrench is interrupted, the “click” from the wrench that signifies that the specified torque has been achieved by occur too early, because breakaway torque is significantly higher than running torque.
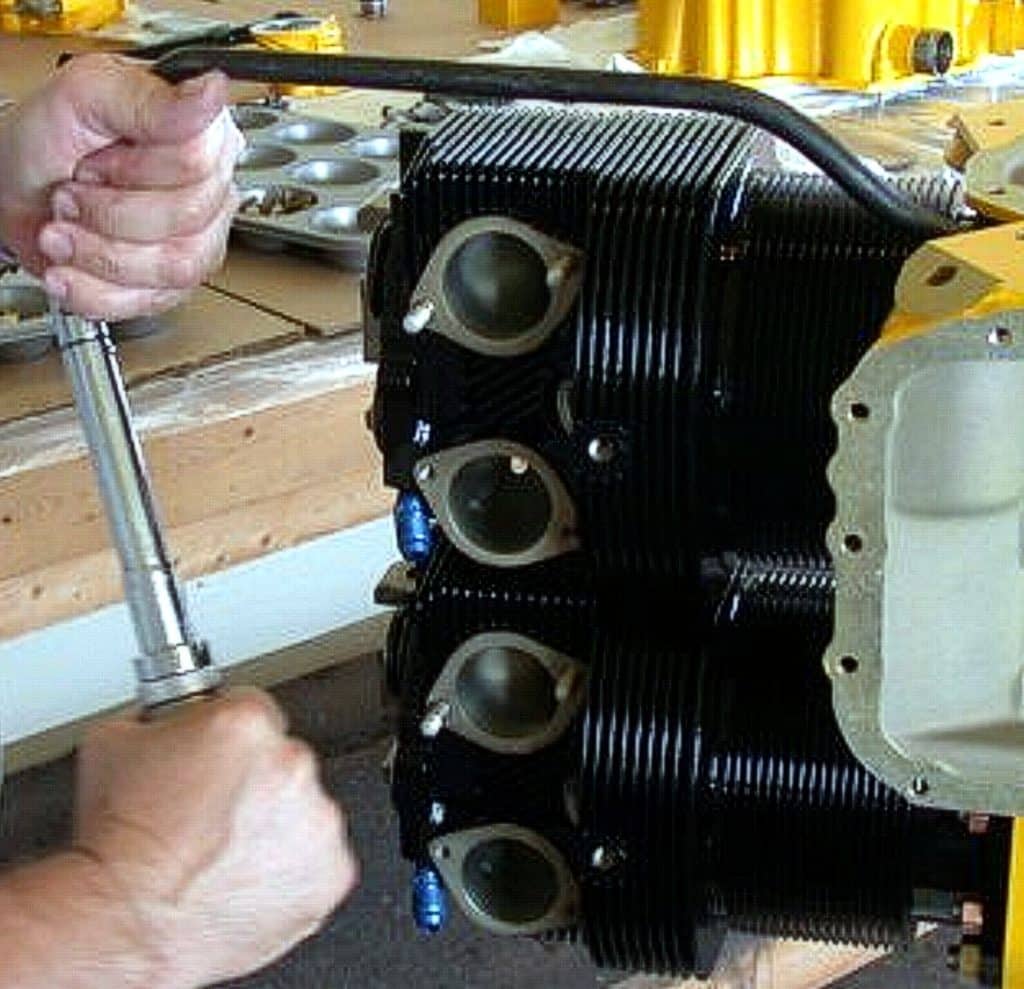
While it’s usually easy to do this properly when the engine is out of the airplane and sitting on an engine stand with unobstructed access, it’s almost impossible to do when the engine is mounted in the airplane and various components restrict wrench movement. Frequently, two or three “bites” of the wrench are needed before final torque is achieved, and each adds uncertainty to the final result. “This is particularly true when wrench rotation must be stopped as the nut is approaching the desired ‘click’ of the wrench—but not there yet,” says Fuchs. “Time after time when the wrench is removed before it clicked, the wrench will do so upon attempting to tighten the nut further with no additional rotation of the nut.” This deceives the mechanic into believing that proper preload has been achieved when it almost certainly hasn’t.
5. Manufacturer instructions are incomplete. The published guidance from Continental and Lycoming leave a lot to be desired. To cite one glaring example, Continental’s overhaul manuals and torque charts emphasize that when a cylinder is replaced, the nuts on both ends of each through bolt must be torqued. In my experience, many mechanics don’t bother with torqueing the nut on the opposite side of the engine. But even if they do, there’s nothing in Continental’s guidance suggesting that the opposite-side through bolt nut should be removed and the nut and threads be lubricated, nor that the opposite-side threads should be cleaned and the opposite-side nut be replaced with a new one. It’s dubious that following the published guidance will accomplish anything with respect to torqueing the opposite-side nut…which is probably why so many mechanics don’t even bother with it unless they’re also replacing the opposite-side cylinder..
Be afraid
If you have a cylinder repaired or replaced, your conscientious A&P probably employed what would generally be considered proper maintenance practices. His torque wrench may have been calibrated recently, set to the proper torque value, and given the reassuring “click” indicating that the desired torque value was achieved. And yet it’s entirely possible that most of the fastener preloads achieved may well be below the design minimum required for safety and reliability of the engine.
Most of the time you and your A&P will get lucky; they cylinder will stay attached and main bearing won’t spin. But occasionally—despite your mechanic’s best efforts—one of those bad things will happen and you’ll fall out of the sky.
Of course, anytime multiple cylinders are replaced, the probability of failure increases with the number of fasteners that are messed with. Food for thought next time your mechanic suggests that it might be a good idea to do a top overhaul.
You bought a plane to fly it, not stress over maintenance.
At Savvy Aviation, we believe you shouldn’t have to navigate the complexities of aircraft maintenance alone. And you definitely shouldn’t be surprised when your shop’s invoice arrives.
Savvy Aviation isn’t a maintenance shop – we empower you with the knowledge and expert consultation you need to be in control of your own maintenance events – so your shop takes directives (not gives them). Whatever your maintenance needs, Savvy has a perfect plan for you: