How to ensure that nothing is coming apart inside your crankcase.
I’d been working with a Bonanza owner in Memphis for several weeks helping him chase down a problem with his Lycoming engine. Yes, Lycoming—the aircraft was an A36 with a Machen conversion to a fire-breathing 350 hp Lycoming TIO-540-J2BD engine. The owner of this hot-rod Bonanza initially reported that the engine had exhibited several episodes of rough running after startup, but that the engine seemed to run smoothly once it warmed up.
The owner emailed me a data dump from his JPI engine monitor, which confirmed my suspicions that his “morning sickness” was caused by a couple of sticky exhaust valves in cylinders #4 and #5. Sticking exhaust valves is a fairly common malady in Lycomings, which is why Lycoming Service Bulletin 388C and Service Instruction 1481A call for doing a “valve wobble test” every 400 or 1000 hours (depending on what kind of exhaust valve guides are installed).
The owner wound up taking his sick engine to an excellent engine shop near Memphis. The shop pulled the rocker covers and found the #4 exhaust valve springs black with carbon from a badly leaking exhaust valve guide. #5 had the same problem, but not quite as bad.
But this article isn’t about sticky valves. It’s about something much more serious.
Flying nozzle
The engine shop decided to inspect the cam and make sure that it was not damaged by the valve-sticking episodes. In most Lycomings (unlike most Continentals), you can’t remove the lifters from the outside of the engine, so the only way to inspect the cam is to pull a jug. The shop proceeded to pull cylinder #4, and it turned out to be a lucky thing they did. The owner emailed me:
“They pulled #4 cylinder and found evidence of damage from a screw hammering the bottom of the piston. They also found marks on the crankcase on one side of the cylinder base. The engine was removed and torn down. They found that the #1 cylinder oil spray nozzle and its helicoil had come out, bounced around inside the engine for some indeterminate period of time, managed to hit all six pistons, and scored two connecting rod end caps.
“What is strange is there was no indication of this in the oil analysis or any evidence when we cut open the oil filter at each oil change. However, when I took your maintenance seminar in Tulsa a few months ago, I learned that Lycoming engines have an suction screen that you said is supposed to be removed and inspected for metal at every oil change. It was this screen that caught the metal from the disintegrating oil spray nozzle and its helicoil, which is why the metal never made it to the filter.
“I checked with the shop that does my oil changes, and they admitted that they didn’t know about the oil screen—they’re mostly Continental dudes. I know I didn’t know about this screen (until I took your recent class), so I didn’t remove it either. After this, I will never forget it, and I’ll make sure my A&Ps don’t forget it.
“The inside of the engine, although marked by the flying nozzle, was extremely clean. The crankcase has to repaired and certified as well as the camshaft. Little evidence of rust was detected on the lifters. All pistons and cylinders will be replaced. The turbocharger will also be overhauled. It looks like I’ll be down for a couple of months. When I get the plane back, I’ll need flying lessons again.
“I wonder how much longer it would have taken for this to cause a catastrophic engine failure? I believe monitoring the engine helped find this, but clearly it would have been found much, much earlier had we been inspecting the pickup screen on a regular basis.”
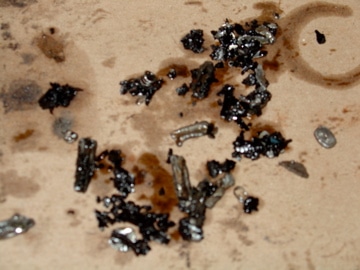
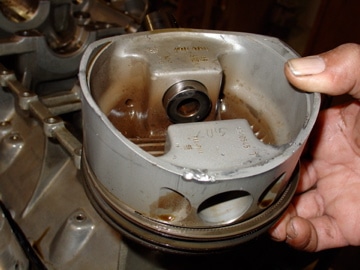
Monitoring for metal
The oil system of any piston aircraft engine provides two levels of filtration. There’s a relatively coarse suction screen at the oil pickup tube whose job is to catch large chunks of metal before they can get to the oil pump (and possibly damage it). Then there’s a fine screen or oil filter after the oil pump whose job is to catch tiny pieces of metal before they can get to the engine’s bearings (and possibly contaminate them).
When implementing a condition-monitoring program, it’s crucial to understand that there are three distinct sizes of metal particles that we’re looking for:
- Large particles or flakes that cannot pass through the suction screen.
- Tiny particles that are too small to be caught by the suction screen and get trapped in the oil filter.
- Microscopic particles that are too small to be trapped by the oil filter.
Therefore, our condition monitoring program must comprise three distinct elements.
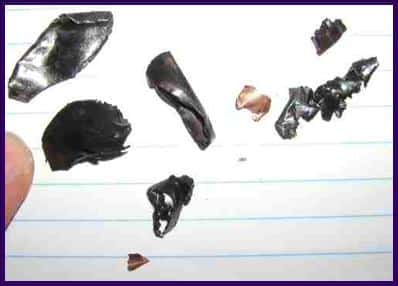
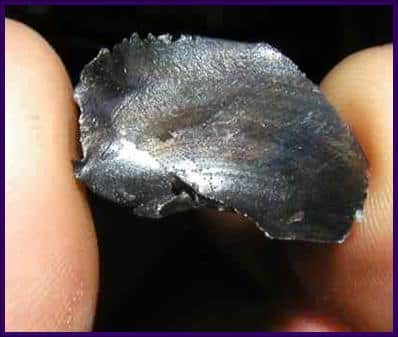
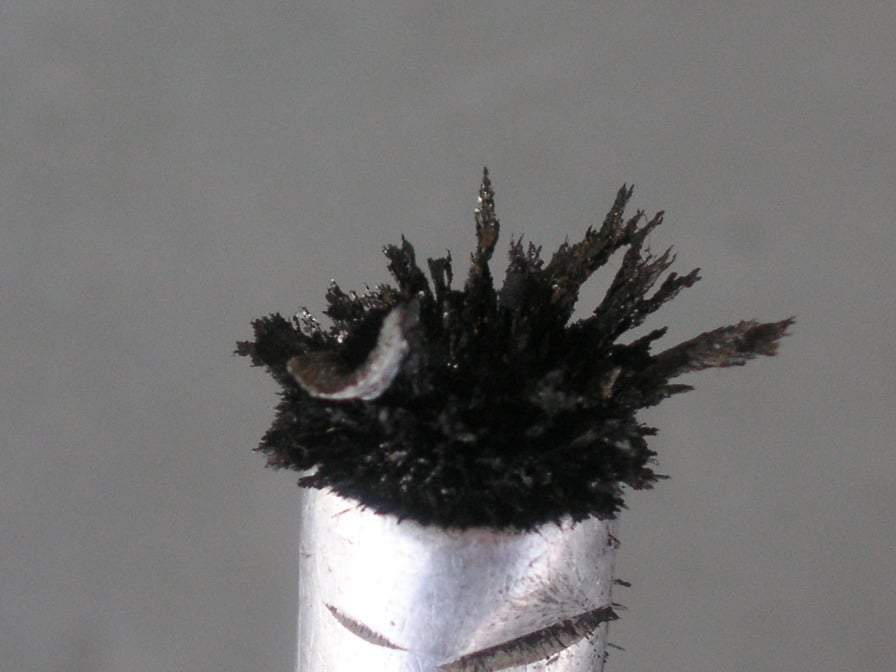
Since microscopic particles are too small to be trapped by the oil filter (and too small to see even if some were trapped), we must place the engine on a spectrographic oil analysis program (SOAP) in order to detect abnormal wear events that throw off such microscopic metal particles. An oil sample should be captured at every oil change and sent to the lab for analysis. (I use and highly recommend Blackstone Laboratories in Ft. Wayne, Indiana—http://www.blackstone-labs.com/).
To detect tiny particles, we must remove and cut open the oil filter at every oil change. Tiny particles can be hard to see, so it’s essential to cut the filter media off its spool, spread it out flat, and carefully inspect each pleat under a bright light (and preferably with a magnifying glass). For engines that have only a fine oil screen instead of a spin-on full-flow oil filter, I strongly recommend adding a full-flow filter because it does a far better job of protecting the engine and provides a far better means for detecting problems before they cause a lot of damage.
To detect large particles or flakes, we cannot rely on filter inspection or oil analysis, because large stuff never makes it to the filter or into the sample jar. For Lycoming engines, we must remove and inspect the suction screen at every oil change. As we’ve seen, this step is often neglected and shockingly some A&Ps don’t even know about it!
Unfortunately, Continental engines do not permit the suction screen to be removed and inspected. (To gain access to the suction screen, you must drop the oil pan, something that usually can’t be done while the engine is mounted in the aircraft.) So for Continentals, about the best we can do is to (1) drain the oil through an external screen and then inspect it for any large particles or flakes of metal, and (2) run a magnetic pickup tool around in the oil drain bucket and see if it picks up any pieces of ferrous metal. (This isn’t a bad idea for Lycomings, too.) Alas, very few A&Ps or aircraft owners perform these steps, either.
The result is that the worst engine problems—the ones that throw off large chunks or flakes of metal—often go undetected until it’s too late. There’s no excuse for this if we’re doing our condition-monitoring job correctly.
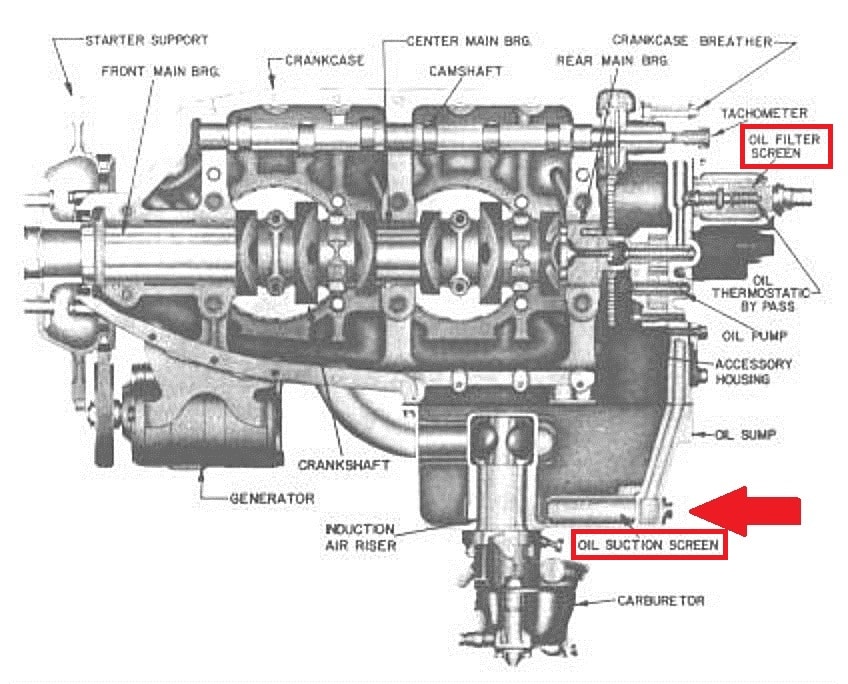
If you do your own oil changes, make absolutely sure that you’re inspecting the suction screen if your engine is a Lycoming, and that you’re checking the drained oil for metal (using a screen and a magnet) if your engine is a Continental. If you have your oil changes done by a shop or mechanic, do not assume that they’re doing this—check it out!
You bought a plane to fly it, not stress over maintenance.
At Savvy Aviation, we believe you shouldn’t have to navigate the complexities of aircraft maintenance alone. And you definitely shouldn’t be surprised when your shop’s invoice arrives.
Savvy Aviation isn’t a maintenance shop – we empower you with the knowledge and expert consultation you need to be in control of your own maintenance events – so your shop takes directives (not gives them). Whatever your maintenance needs, Savvy has a perfect plan for you: